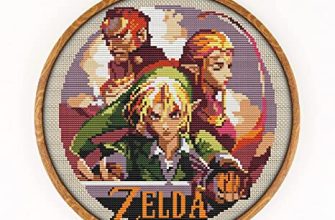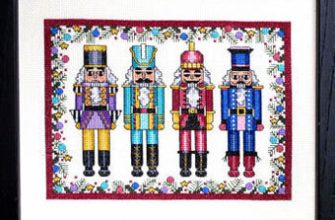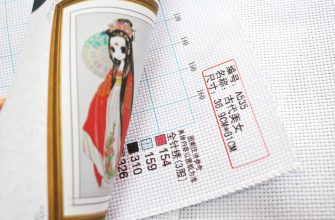
A cross stitch pattern can be created from any image. To use a picture that is suitable for a cross stitch pattern, you should choose one that is simple in shape without many details and colours. Crop and enlarge the image if necessary. You can also use the posterize feature of a photo editing program. This feature transforms a picture into definable shapes and makes matching colours easier.
Work on a grid
When working with complex patterns, you may want to work on a grid. You can do this by using different colors for the grid lines. You will save time by not having to count every square. For example, if the pattern is a square with borders of orange and rose, you will be able to find it easier. The lines should contrast with the fabric. Using a fine-point felt-tip marker, you can color the lines on the chart. If you plan to use colored thread, try using heavy or metallic thread to make the lines stand out.
The lines on the chart must be lined up. Start with a ten-hole grid and repeat the stitch on the eleventh. This creates a horizontal and vertical line. When you stitch, make sure that you place your needle through the first and last holes. Repeat this step for each row of the pattern until you reach the end of the grid. Then, begin stitching the next row.
If you want to work on a grid, you need to have a flat surface and a ruler. You can also use a fabric marking pen to mark the fabric. Once you’ve done this, stitch the grid into the fabric. Having a grid on your fabric will help you stay organized. Also, grids are useful when you don’t know how to place your cross stitch fabric.
Pre-wash fabric
It may be tempting to throw the finished fabric into the dryer before you start using your cross stitch pattern, but do it at your own risk. To save yourself a lot of trouble later, you can always throw the fabric into the washing machine before you begin your work. It’s best to pre-wash fabric before you start using it to avoid color transfer. If you aren’t able to do this, you can always use a white scrap of fabric in the washer to test the colorfastness of your finished product.
After washing the fabric, it may look rumpled or crumpled. To eliminate this, it’s best to use an iron with low temperature on the fabric. For delicate fabrics, use low temperature. For cotton and linen, you can use medium to high. If you’re unable to remove deep wrinkles with the iron, use steam. If your fabric is very delicate, use a piece of cloth to prevent it from becoming soiled.
To clean your cross stitch, you’ll need to remove any excess fluff. Before washing, you can use masking tape to secure the ends of your thread. Make sure to fasten them securely, as these can become loose during the wash. To start the process, you’ll need a bowl of tepid water and some mild detergent. The detergent should dissolve completely before adding the fabric to the water. After you’ve added the detergent, you’ll need to wait for the fabric to soak in the water. This may take a while, depending on the severity of the stain and the size of your cross stitch.
Check for colourfastness
When choosing a pattern, check for colourfastness. Depending on the threads used, some threads can run in hot water. To check for colourfastness, simply turn your work face down and gently press the back of the stitches with a white tissue. If you see any colour on the tissue, your threads are not colorfast. However, you can wash the piece after you finish it if you want to keep the pattern in good condition.
Most threads are dyed differently from each other, so it is important to check for colourfastness. Generally, the effect is the same. However, you can still get some differences, which is why it’s important to buy a few skeins of the same thread to ensure consistency. You can also choose threads that are different in hue, which means that they’ll look differently when stitched.
When choosing threads for cross stitching, be sure to check the material’s colourfastness. Some threads are dye-lot sensitive and can vary from shipment to shipment. It’s impossible to find the same colours when they’re sold out, and many companies don’t even keep the same colours in stock. A good resource for finding out if a thread is colourfast is Classic Cross Stitch.
Follow a chart
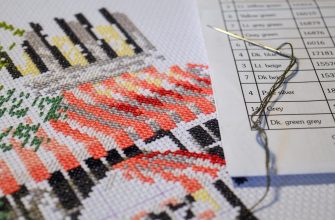
Cross stitch patterns have traditionally been represented on grid paper. Each square represents one stitch. Similarly, the chart will include line numbers for each stitch. Line numbers on the chart are helpful in keeping stitchers in place. The stitching chart should be easy to read so that the cross stitcher can follow along with the pattern. Here are some tips for using a chart when using a cross stitch pattern:
Before stitching, cut the fabric to the appropriate size. If the chart states a 5 x 7 quilt, you should cut fabric 13 inches by 15 inches. Leave four inches of fabric at the edges for trimming later. Otherwise, you may make a mistake and stitch your quilt incorrectly. The extra fabric is useful for tying a thread to the pattern. Follow the chart closely. By following a chart, you can avoid making mistakes or miscalculating the stitching.
When using a cross stitch chart, start in the middle of the design. This will ensure that your pattern is centered in the fabric. Most charts feature small arrows at the center point, so find an area near the center to stitch. Using large blocks of color for the first few rows of the pattern will be easier than changing the pattern too frequently. But make sure to follow the chart when using a cross stitch pattern!
Work on a canvas
When you decide to create a needlepoint project, you may be wondering how to best work on a canvas with a cross stitch design. Many cross stitch patterns are adapted easily to needlepoint, as long as you have the right canvas size. Most common canvas sizes are 12 mesh, 14 mesh, and 18 mesh, and are used when full stitches are the focus. When choosing a canvas, consider the size of your finished cross stitch project and the complexity of the design.
The first step in working on a canvas with a cross stitch design is to prepare the fabric for the cross-stitching process. You should prepare the canvas by cutting it to the desired size and waste canvas size. Next, fold the canvas both ways and mark the center with a pencil. Note that the canvas isn’t going to be visible when finished, so it’s important to fold it both ways. Once the canvas is cut to size, you can lay it over the desired area and line up the threads and fabric.
Once you have prepared the fabric, start working on the cross stitch pattern. Before you begin, fold the canvas in half, and mark the center with a pin or small stitch. To ease yourself into the process, you can also use an embroidery ring to stretch the fabric and make it easier to stitch. You will also need to prepare the canvas with a thread of the same color as the threads.
Work on a tapestry needle
When working a cross stitch pattern on a tapestie, it is important to understand the difference between a regular sewing needle and a tapestry needle. A sewing needle can be blunt or even sharp, and a tapestry needle is designed to protect the fabric from damage and keep the grid of woven threads in place. Tapestry needles are designed with an eye that accommodates multiple strands of thread. The thicker the strand of thread, the greater the risk of damaging the fabric during stitching.
A tapestry needle is similar to a standard sewing needle, but is blunt instead of pointed. A blunt tapestry needle is better for working on fabrics with open weave because its blunt end will prevent the fabric from splitting and tearing during stitching. It also prevents fraying of the fabric by gliding through the openings of the canvas. It also works well on plastic canvas crafts because it does not require brushing, piercing, or sharp points.
You can use a tapestry needle for many different types of stitches. Some stitches work better on a tapestry needle than others, so read the pattern carefully before you start. Choosing the right stitch type will depend on the pattern and the purpose of the finished item. Hand embroidery is a great way to relax after a busy day and express yourself with your own creativity. With a little knowledge and practice, you can make useful things that will last for years.
Frame your cross stitch
When it comes to framing your cross stitch pattern, you should know that you don’t have to spend a fortune. You can easily frame your work yourself using standard-size frames and add fabric embellishments, ribbons, or trim. A custom-made mat can enhance the beauty of your work and complement the size of your frame. It is important, however, to avoid getting it too far off-dimension. Listed below are some ideas for framing your cross stitch pattern.
Before framing your cross stitch pattern, you should use the appropriate mat. Choose a mat that matches the color of your cross stitch design, and make sure it is the same size as the frame. Make the front mat slightly smaller than the back one, allowing you to contrast colors. For best results, choose a frame with a non-reflective glass, as a reflective surface may blur the edges and muffle the colors. In addition, choose a frame with a solid backing.
When framing your cross stitch pattern, it is essential to choose a suitable frame. A simple photo frame can be used, and the amount of space around the design is largely up to you. Generally, a standard-size frame leaves about one to three inches around the design. In addition, the frame can have a mat made from cardboard or stock photo paper. These can be removed after you finish framing the cross stitch pattern.
